A front and back view
A look inside at the pockets. A flat slip pocket one side and a zippered pocket the other
And one of me posing with it (to get an idea of the size, not at all because I like photos of myself!)Now if you care to see an overview of the process, continue reading-
I cut the strips of yellow and white 8cm x the width of the drill (1m wide) and one grey strip 13cm by the width of the drill (1m again). I then sewed each to each other with a quarter inch seam.
Once I had sewed all the strips, I cut the back and front piece from it.
I satin stitched on my little fishy (that seemed to take forever to handstitch all that white on!) I placed it about 5cm from the right hand side as I was going to box the base of the bag and didn't want it too close to the edge.
I pinched the bottom corners so that the seams met and marked where the width was 3 inches (sorry to jump around with the measurements but my quilting ruler is in inches) and stitched across to form the boxed base. I then trimmed off the triangles and turned it out the right way.
I measured the width of the bottom (14inches), then pleated the top to measure the same.
I just marked the centre and worked either side of that to get even pleats on the front and back pieces. I stitched across the pleats to keep them in place.
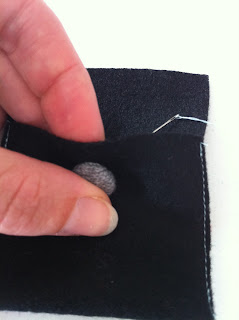
I decided a tab with a magnetic snap would be best for the closure. I used some offcuts of the body fabric and followed the instructions to insert the snaps. I stitched a box around it.
I used some heavy iron on interfacing. I sewed around the three sides of the closure, right sides together then turned right side out and iron well.
I lined up where the snap would go on the front piece of main body and inserted it, using heavy interfacing to cover it and stitched a box around it also.
Now for the lining-
I cut two 17inch squares and inserted a zippered pocket on one piece and a slip pocket on the other. I did this by following instructions in my book 'The Bag Making Bible' by Lisa Lam this is a super great book if your into making bags. The pockets worked out perfectly!
I then placed the two pieces RST and stitched the sides and the bottom (I did the bottom twice for extra strength). I made the boxed base as I did the outer fabric. I then marked in 1 1/2 inches from each side on the top edge and drew a line from the side (about 5 inches up from the boxed corners at the bottom) to the top. Then stitched along this line. I did place the lining inside the outer to make sure it fit well before I trimmed it.
Now all that I had to do was make the handles. I was going to make a single handle from one side to the other but decided the bag would better suit two shorter handles. I measured a supermarket re-useable bag handle (as this was about the length I wanted). It was about 23inches long. I cut 2 of each yellow and grey pieces that measured 25 inches by 3 inches and 2 white pieces 25 by 2 inches. I then stitched one grey to a white then yellow onto the other side of the white. I then repeated this for the other handle. I ironed the seams open.
I folded this in half long ways (wrong sides together) and ironed. Then I open this and folded both sides into the middle and ironed. I then closed up the initial fold again. Repeat this for the other handle. I then stitched (less than quarter inch) down each side of the closed up strip
Now I have all my pieces, it's time to assemble.
I folded down the top edges on my lining and the main bag body (about 1/2 inch) and ironed. I placed the lining inside the main bag body and marked where I wanted the handles (near my pleats) and pinned the handles to the folded over top edge and stitched back and forth a few times to secure (removing it again from the outer bag body obviously). I did this on both sides.
I then put it back inside and pinned around the entire top edge, placing my closure tab in between the lining and the main body on the back of the bag in the centre. (making sure the two pieces of the magnetic snap lined up)
I stitched all the way around the top edge and it was finally finished!

Wow there was a whole lot of 'I' in this post! Hope you enjoyed reading about my bag and if you want to make one that it is clear enough to follow!


